The best tool to make a bootable OS X utility is DiskMaker X.
Click the link below to be taken to the tool download page.
https://www.macupdate.com/app/mac/39701/diskmaker-x/download
Use Terminal to create the bootable installer
Read more: Useful tool to make a bootable OS X USB/disk
- Plug in the USB flash drive or other volume that you’re using for the bootable installer.
- Open Terminal, which is in the Utilities folder of your Applications folder.
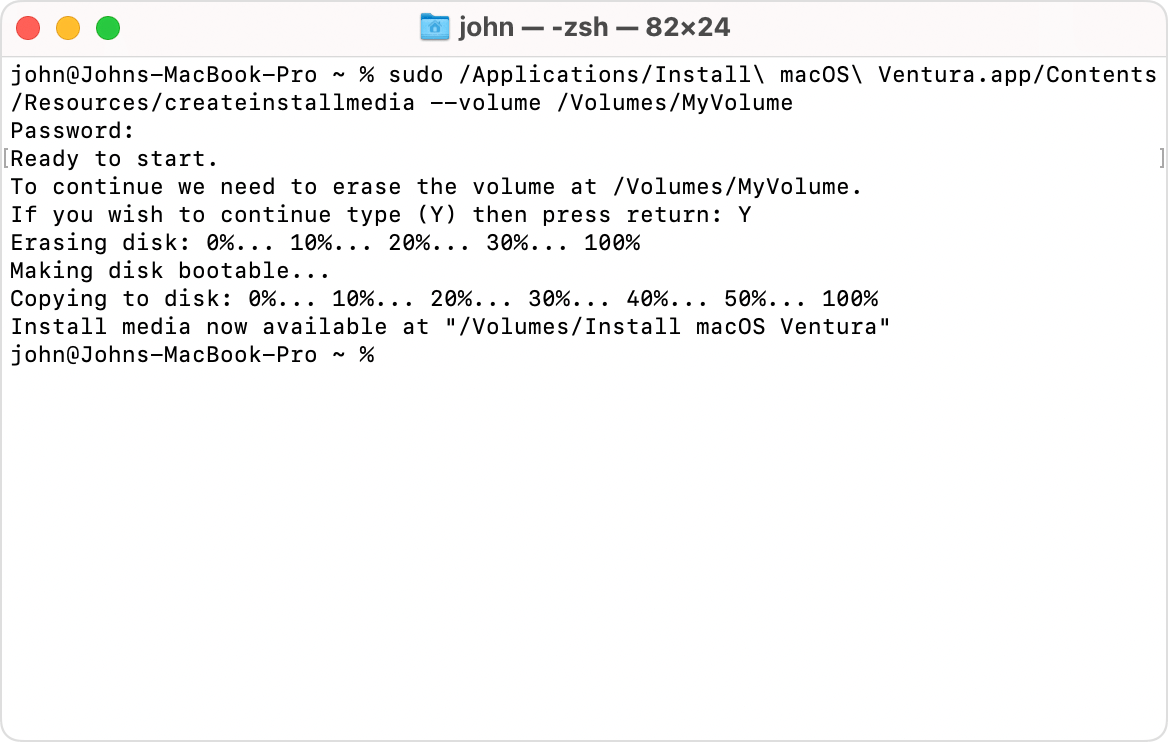
- Type or paste one of the commands below into Terminal, then press Return to enter the command. Each command assumes that the installer is in your Applications folder and MyVolume is the name of the USB flash drive or other volume you’re using. If the volume has a different name, replace
MyVolumein the command with the name of your volume. - When prompted, type your administrator password. Terminal doesn’t show any characters as you type. Then press Return.
- When prompted, type Y to confirm that you want to erase the volume, then press Return. Terminal displays the progress as the volume is being erased.
- After the volume has been erased, you may see an alert stating that Terminal would like to access files on a removable volume. Click OK to allow the copy to proceed.
- When Terminal says it’s done, the volume will have the same name as the installer you downloaded, such as Install macOS Ventura. You can now quit Terminal and eject the volume.
Commands
Depending on which macOS you downloaded, enter one of the following commands in Terminal as instructed above.
If your Mac is using macOS Sierra or earlier, the command should conclude with --applicationpath followed by the appropriate installer path, as shown in the command below for El Capitan.
Ventura
sudo /Applications/Install\ macOS\ Ventura.app/Contents/Resources/createinstallmedia –volume /Volumes/MyVolume
Monterey
sudo /Applications/Install\ macOS\ Monterey.app/Contents/Resources/createinstallmedia –volume /Volumes/MyVolume
Big Sur
sudo /Applications/Install\ macOS\ Big\ Sur.app/Contents/Resources/createinstallmedia –volume /Volumes/MyVolume
Catalina
sudo /Applications/Install\ macOS\ Catalina.app/Contents/Resources/createinstallmedia –volume /Volumes/MyVolume
Mojave
sudo /Applications/Install\ macOS\ Mojave.app/Contents/Resources/createinstallmedia –volume /Volumes/MyVolume
High Sierra
sudo /Applications/Install\ macOS\ High\ Sierra.app/Contents/Resources/createinstallmedia –volume /Volumes/MyVolume
El Capitan
sudo /Applications/Install\ OS\ X\ El\ Capitan.app/Contents/Resources/createinstallmedia –volume /Volumes/MyVolume –applicationpath /Applications/Install\ OS\ X\ El\ Capitan.app

